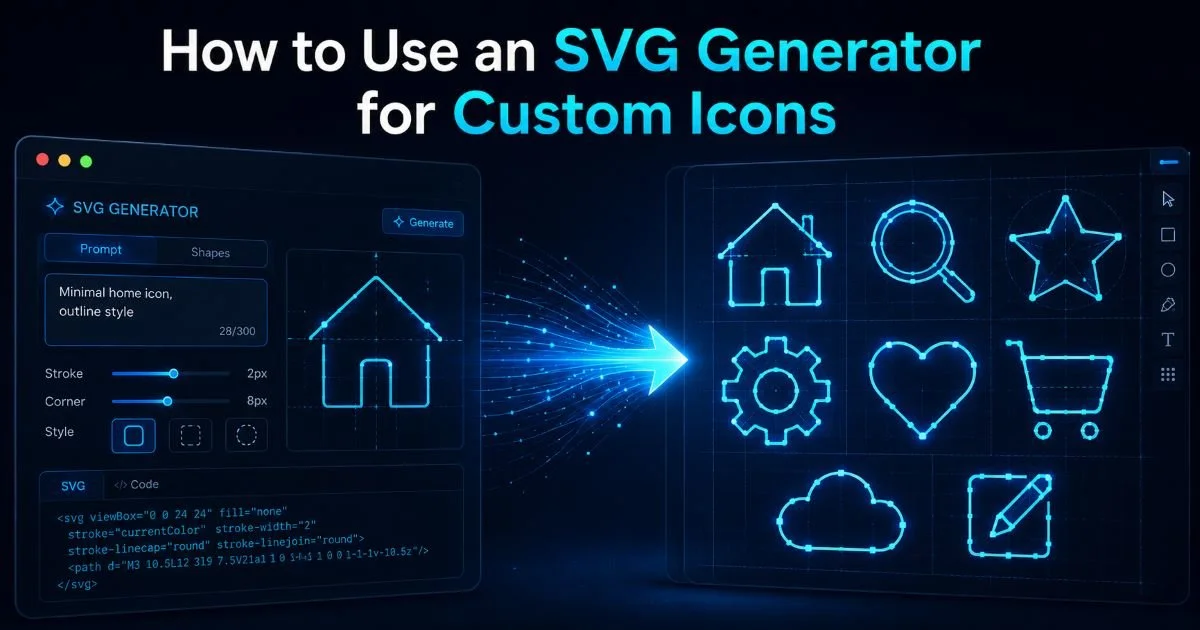
How to use an SVG generator for custom icons is one of the most practical skills a web designer or developer can pick up today. Custom icons give your projects a distinct visual identity, but building them from scratch in traditional design tools takes time and specialized knowledge. SVG generators streamline the process by converting simple text inputs or basic descriptions into clean, scalable vector graphics ready for production use.
Whether you're building a component library, designing a dashboard, or branding a new product, understanding this workflow saves hours. The stakes are real: generic icon packs make your work look like everyone else's, while custom SVG icons set you apart. If you've ever explored text to SVG conversion, you already know the basics. This guide walks you through the complete process step by step.
Key Takeaways
- SVG generators turn plain text descriptions into production-ready vector icon files.
- Custom icons built as scalable vector graphics look sharp on every screen size.
- Optimizing your SVG output reduces file size and improves page load times significantly.
- Clear, specific text prompts produce far better icon results than vague descriptions.
- Testing icons across browsers catches rendering inconsistencies before your users do.
Step 1: Choose the Right SVG Generator
The first decision in learning how to use an SVG generator for custom icons is picking the right tool. Not all generators produce the same quality of output, and the differences matter when you're working on production projects. Some tools focus on simple shapes and badges, while others handle complex icon designs with fine detail. Your choice should align with the complexity of icons you need and the workflow you prefer.
What to Look for in a Tool
A strong SVG generator should accept text input and return clean, well-structured SVG markup. Look for tools that produce code without excessive nested groups, inline styles, or unnecessary metadata. The output should use standard SVG elements like path, circle, and rect so your icons remain easy to style with CSS. Tools like TXT to SVG focus specifically on converting text descriptions into vector graphics, which is exactly what icon creation demands.
You should also consider whether the tool supports batch processing. If you're building an icon set of 20 or 30 icons, generating them one at a time becomes tedious. Some generators, including AI-powered options found among the best custom GPTs, allow you to describe multiple icons in sequence and maintain visual consistency across the set. At the end of this step, you should have one or two SVG generators bookmarked and ready to test.
Test your chosen generator with three different icon descriptions before committing to a full project.
Consider the licensing terms as well. Some generators produce output under open licenses, while others retain certain rights or restrict commercial use. Read the terms before integrating generated icons into client work. A tool that produces clean scalable vector graphics but restricts how you use them commercially isn't much help for professional projects.
Step 2: Craft Your Icon Descriptions
The quality of your custom icons depends almost entirely on how well you describe them. An SVG generator interprets your text input and translates it into vector shapes, so vague prompts produce vague results. Think of your description as a creative brief: be specific about shape, style, stroke weight, and visual metaphor. The more precise your language, the closer the output matches your vision on the first attempt.
Writing Effective Prompts
Start each description with the core object, then layer on style details. Instead of writing "settings icon," try "a gear with six teeth, rounded corners, thin 2px stroke, no fill, centered circular cutout." This kind of specificity guides the text to SVG conversion process toward exactly what you need. Include information about whether you want filled shapes or outlined strokes, rounded or sharp corners, and any specific proportions.
| Description Quality | Example Prompt | Typical Result | Iterations Needed |
|---|---|---|---|
| Vague | "home icon" | Generic house shape | 4 to 6 |
| Moderate | "simple house outline with chimney" | Recognizable but plain | 2 to 3 |
| Detailed | "house outline, 24x24, 1.5px stroke, flat roof, single door, no fill" | Production-ready icon | 1 to 2 |
Consistency matters when you're building a set. Define a style guide before you start generating. Specify a consistent stroke width (1.5px or 2px are common), a viewBox size (24x24 is standard for UI icons), and a visual style such as outlined, filled, or duotone. Apply these parameters to every description. This approach prevents your icon set from looking like it was assembled from five different sources, which is a common pitfall.
Avoid mixing filled and outlined styles within the same icon set unless you intentionally want visual hierarchy differences.
At the end of this step, you should have a written list of icon descriptions, each following your style guide. Keep these in a spreadsheet or text file. This becomes your reference document and makes regeneration easy if you need to adjust the style later. Good documentation here saves significant rework downstream.
"The difference between a mediocre icon and a great one almost always comes down to how precisely you described it."
Step 3: Generate and Refine Your SVG Icons
Now comes the hands-on work. Feed your descriptions into your chosen SVG generator and evaluate the output. Understanding how to use an SVG generator for custom icons means accepting that the first result rarely ships directly to production. Plan for at least one round of refinement. Open the generated SVG in a browser tab and inspect it at multiple zoom levels to verify that lines remain crisp and shapes are geometrically sound.
Common Mistakes During Generation
One frequent mistake is ignoring the viewBox attribute. If your generator outputs an SVG without a proper viewBox, the icon won't scale correctly when you resize it in CSS. Always verify that the viewBox matches your intended dimensions, typically "0 0 24 24" for standard UI icons. Another common error is accepting SVG files with embedded raster images or base64 data, which defeats the purpose of using vector graphics entirely.
Some generators add XML declarations or DOCTYPE headers that are unnecessary for inline SVG use in HTML5. Strip these out.
Refinement often involves minor manual edits. You might need to adjust a path's control points, simplify overly complex curves, or remove redundant groups. A basic understanding of SVG path syntax helps here: the d attribute on a path element uses commands like M (move), L (line), C (cubic curve), and Z (close path). You don't need to memorize every command, but recognizing the structure lets you make targeted fixes without redoing the entire icon.
Test each icon inside a realistic UI context. Drop it into a navigation bar, a button, or a card component. Icons that look fine in isolation sometimes feel too heavy or too light alongside text and other interface elements. Adjust stroke weights or overall proportions based on this contextual testing. At the end of this step, you should have a folder of refined SVG files that look correct at multiple sizes and in context.
If you're working with a vector graphics tool like Figma or Inkscape for final tweaks, export back to SVG rather than editing the raw code exclusively. This hybrid approach, using a generator for the initial creation and a visual editor for polish, tends to produce the best results for complex icons that need pixel-perfect alignment.
Keep both the original generated SVG and your refined version. You may want to regenerate from the original if your style guide changes.
Step 4: Optimize and Implement Icons in Your Project
Optimization is where many developers skip steps and pay for it later with bloated page sizes and inconsistent rendering. Run every SVG file through an optimizer like SVGO before adding it to your codebase. SVGO removes comments, editor metadata, empty attributes, and redundant transforms. A typical unoptimized SVG icon shrinks by 20% to 60% after processing, which adds up fast across an entire icon set. This step is especially relevant if you plan to inline your SVGs directly in HTML.
Integration Best Practices
You have three main options for adding SVG icons to a web project: inline SVG, an SVG sprite sheet, or individual SVG files loaded via img tags. Inline SVG gives you full CSS and JavaScript control, making it ideal for icons that change color on hover or animate on interaction. Sprite sheets reduce HTTP requests by bundling all icons into one file. External files via img tags are simplest but sacrifice styling flexibility. Choose based on your project's performance requirements and interactivity needs.
Set up a consistent naming convention for your icon files. Use lowercase, hyphenated names like icon-settings.svg or icon-home.svg. This makes your icon directory scannable and works well with build tools that auto-generate icon components. If you're using a framework like React or Vue, consider creating a wrapper component that accepts an icon name prop and renders the corresponding SVG. This pattern keeps your templates clean and your icons manageable.
Add aria-hidden="true" to decorative icons and descriptive aria-label attributes to functional icons for accessibility compliance.
Cross-browser testing catches the remaining edge cases. SVG rendering varies slightly between Chrome, Firefox, Safari, and Edge, particularly around stroke rendering and text within SVGs. Open your icons on at least two browsers and verify they match. Mobile testing matters too, since touch targets around small icons need adequate spacing. Similar attention to detail applies across all digital content creation; even tasks like writing optimized ad copy benefit from the same iterate-and-test mindset. By this step's end, you should have a fully optimized, well-organized icon set integrated into your project.
Frequently Asked Questions
?How specific should my text prompts be when using an SVG generator?
?Is a text-based SVG generator better than a visual editor for icon sets?
?How long does it realistically take to build a 20-icon set with an SVG generator?
?Can I use SVG generator output in commercial client projects without issues?
Final Thoughts
Learning how to use an SVG generator for custom icons transforms your design workflow from tedious manual labor into a fast, iterative process. The four steps above, choosing a tool, writing precise descriptions, refining output, and optimizing for production, form a reliable system you can repeat for every project.
Custom SVG icons built this way scale perfectly, load quickly, and give your interfaces a cohesive visual identity that stock icon packs simply cannot match. Start with a small set of five icons, follow this process, and you'll see the difference immediately.
Disclaimer: Portions of this content may have been generated using AI tools to enhance clarity and brevity. While reviewed by a human, independent verification is encouraged.